
A good way to start any garment sewing project is by recording your measurements. This first step will help you choose your size correctly and will make the fitting process much more smoother.
That being said, perhaps you’re wondering how to take good and accurate measurements of yourself? Then the following instructions are for you.

Before getting the tape measurer out, note that measuring your body on your own can be difficult (just imagine having to record the width of your back on your own and you’ll understand why…). But apart from a couple impossible measurements you’ll need help with, most of them can be done alone.
That being said, don’t record a measurement you had to twist yourself to take or you’ll end up with false information. So for all back measurements, prefer to ask someone’s help.
Prepare for taking measurements
You’ll need to find a vertical mirror (one you can see all of yourself into), a tape measurer, some small stickers and a piece of string or 6 mm (1/4″) wide elastic.
Remember to relax so you won’t make yourself tense and end up with inaccurate numbers. Why not put some music on (but avoid dancing!) and start recording?
Use the mirror to make sure that you’re standing straight and your tape is levelled when taking the measurements.

Measure yourself in your normal, everyday underwear (no cheating with a very push up bra unless it’s something you always wear). For the measurements that need someone else’s help, if it’s someone you wouldn’t be comfortable being in front of in your underwear, it’s perfectly okay to wear a tight tank top and legging.
A trick that’s very helpful for accuracy and consistency is to “mark” important points with a sticker. This will visually help you when taking numerous measurements from the same point.

Important points to mark would be the base of your neck (just in the small gap you have in the center of your collar bone). On the end of your shoulder, on the bone, which is in fact the end of your collar bone. And on the back of your neck, where the last vertebra is. (If you can’t find it, simply lower your head and the bone will pop right up!)
Same goes for the waist. Use the piece of string or elastic that you’ll tie about 6 mm (1/4″) above your belly button. This marks your natural waistline. It should land more or less where your body is at it’s narrowest or where your hands naturally fall when you put them on your waist. Don’t feel obligated to follow the 6 mm rule, this is just an industry standard which can help you find the right spot, always follow your actual body curves when recording personal measurements.

By tying the string around your waistline, you’ll make sure every measurement you’ll take from/to the waist will be starting/ending at the same level and have more accurate results.
Important measurements
The three most important measurements to determine are your bust, waist and hip. With them, you’ll be able to choose the correct size to make for yourself. The nice thing? You don’t need anyone to help you with these.
The bust measurement will be taken around the fullest part of your bust.

The waist is measured on your guideline string.

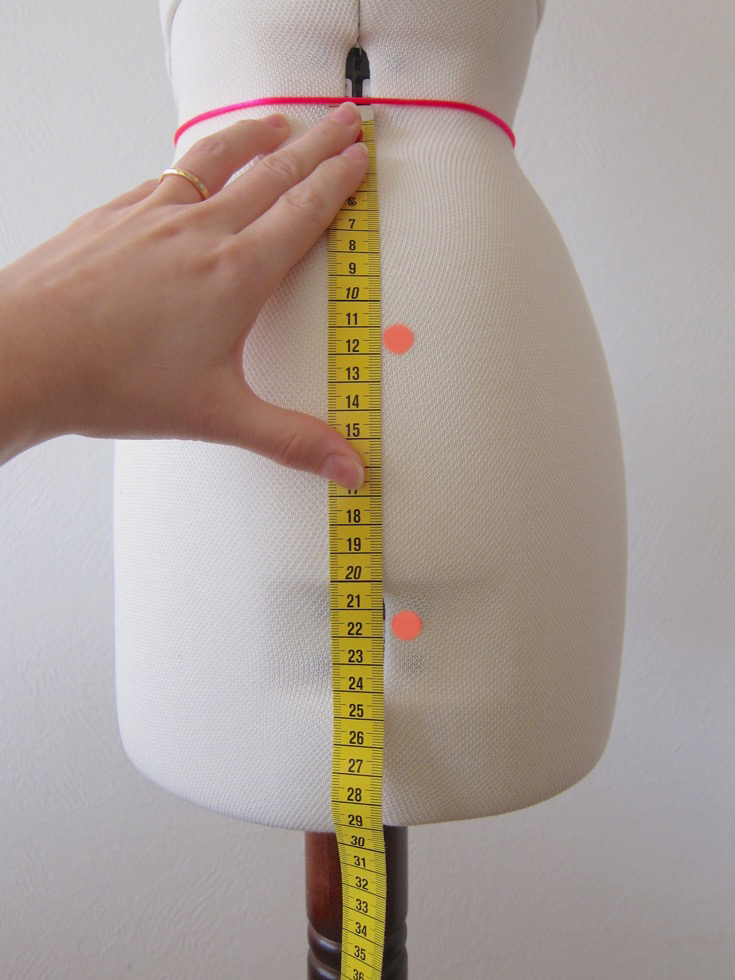
For the hip measurement, because of the great variety of women shapes, it can be helpful to record two separate measurements, your high hip and your low hip or full hip.
To help you find them, the industry standard will tell you to measure about 11 cm (4 1/2″) from your waist and place a sticker for your high hip level. But more importantly, because this number is a standard and few people fit the standard, check that it falls at the upper swell of the hip over the pelvic bone. This could be anywhere between 10 cm and 20 cm (4” and 8”) from your waist. Measure around this part and record the result for your high hip.
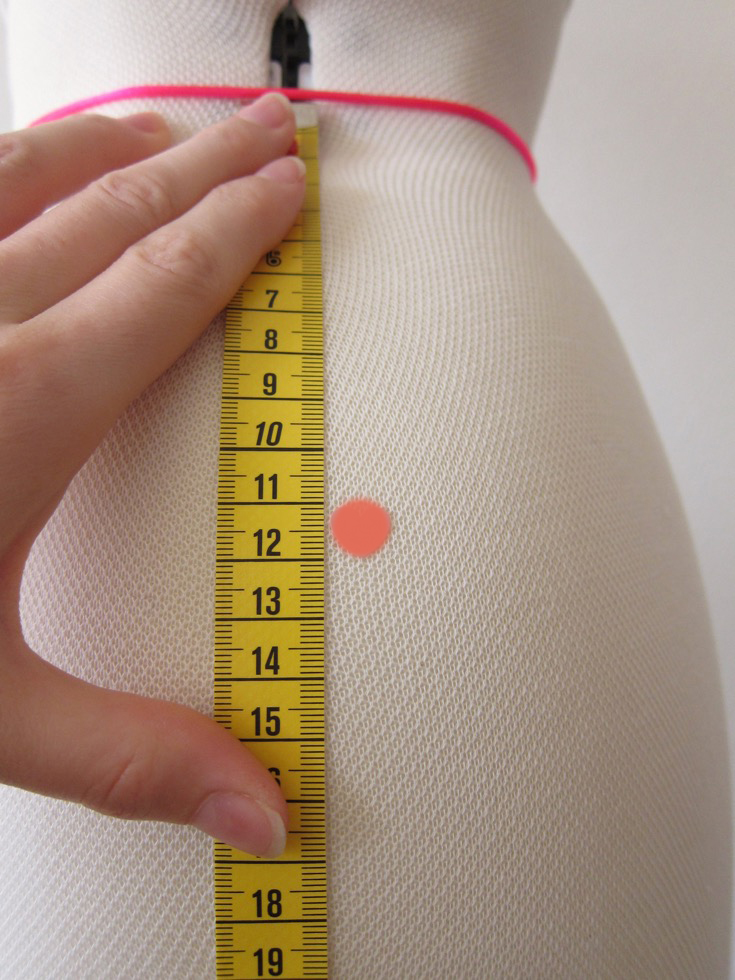
Then again starting from your waist, measure about 22 cm (8 1/2″) and mark your low hip with a sticker. Again, this number is an industry standard. You want to have it fall around the fullest part of your hips, usually around the fullest part of your figure.

These three measurements are the essential ones to take. After that, it’s only a question of how much more you’ll need for fitting. When in doubt, know that the more you take the better.
Additional measurements
Some useful additional ones would be around your arm, which will give you your armhole measurement.
Around the base of your neck.

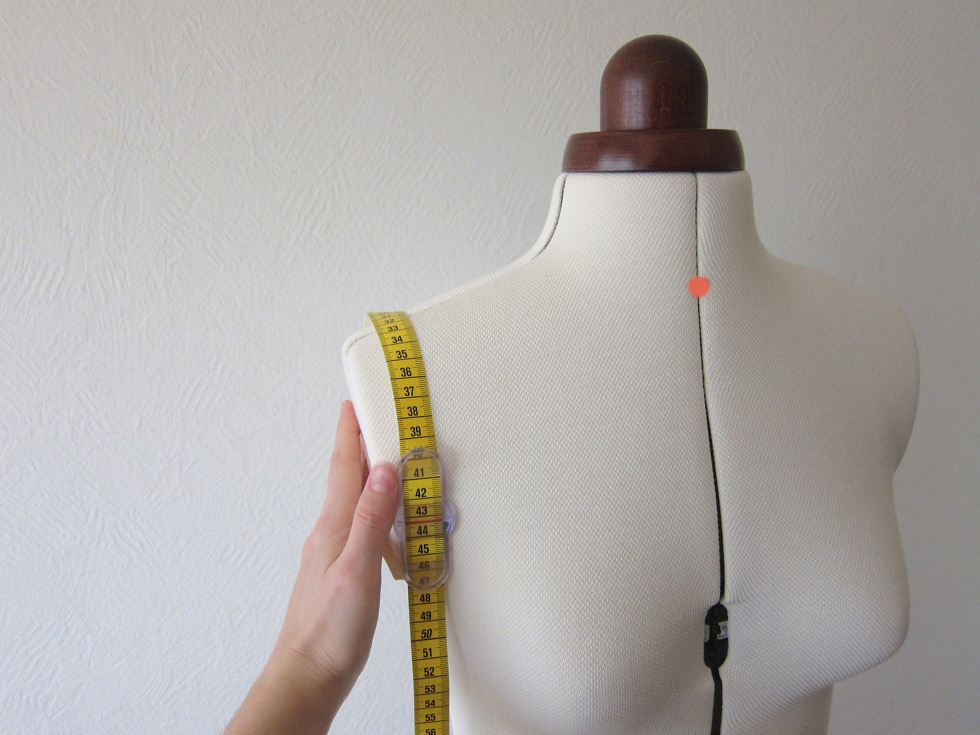
Your shoulder length, that is from the base of your neck to the sticker on your shoulder.

Your back length which is from your neck point to your waist. Measuring your front length in the same manner could also be a useful information to have.

And finally, your cross front and cross back measurement which you’ll take “flat” using a solid ruler by recording the distance between your arm creases.


That’s it! You have just recorded your very own set of measurements and can now select a size knowing it’ll fit you. Well done!